Don't start mixing in Ableton Live without THIS!
Credit: @Zdrewe
Introduction
Key idea:Getting levels right is more important than tweaking plugins by0.1 dBor using hundreds of plugins - proper leveling is the foundation of a good mix.Process / settings:Start with the master channel approach and work through individual elements systematically.Result:Saves time on mixing and mastering, and makes music production more enjoyable without compromising sound quality.Notes:This method can be replicated in any DAW with some adjustments.
00:00 → 00:22

Master Channel Setup
Key idea:Set up a limiter or clipper on the master channel from the start to guide your mixing decisions.Process / settings:- Add a limiter/clipper to master channel (can use free, paid, or stock plugins)
- Download Ableton's free Creative Extensions pack for better limiter option (don't use stock Ableton limiter)
- Mix into the limiter to hear how elements interact at proper loudness
Result:With limiter on, you can immediately hear over-compression and distortion, helping you make better leveling decisions before mastering.Notes:Mixing into a limiter saves time on tweaking levels during mastering and throughout the mastering process in general.
00:22 → 01:12
Leveling Method
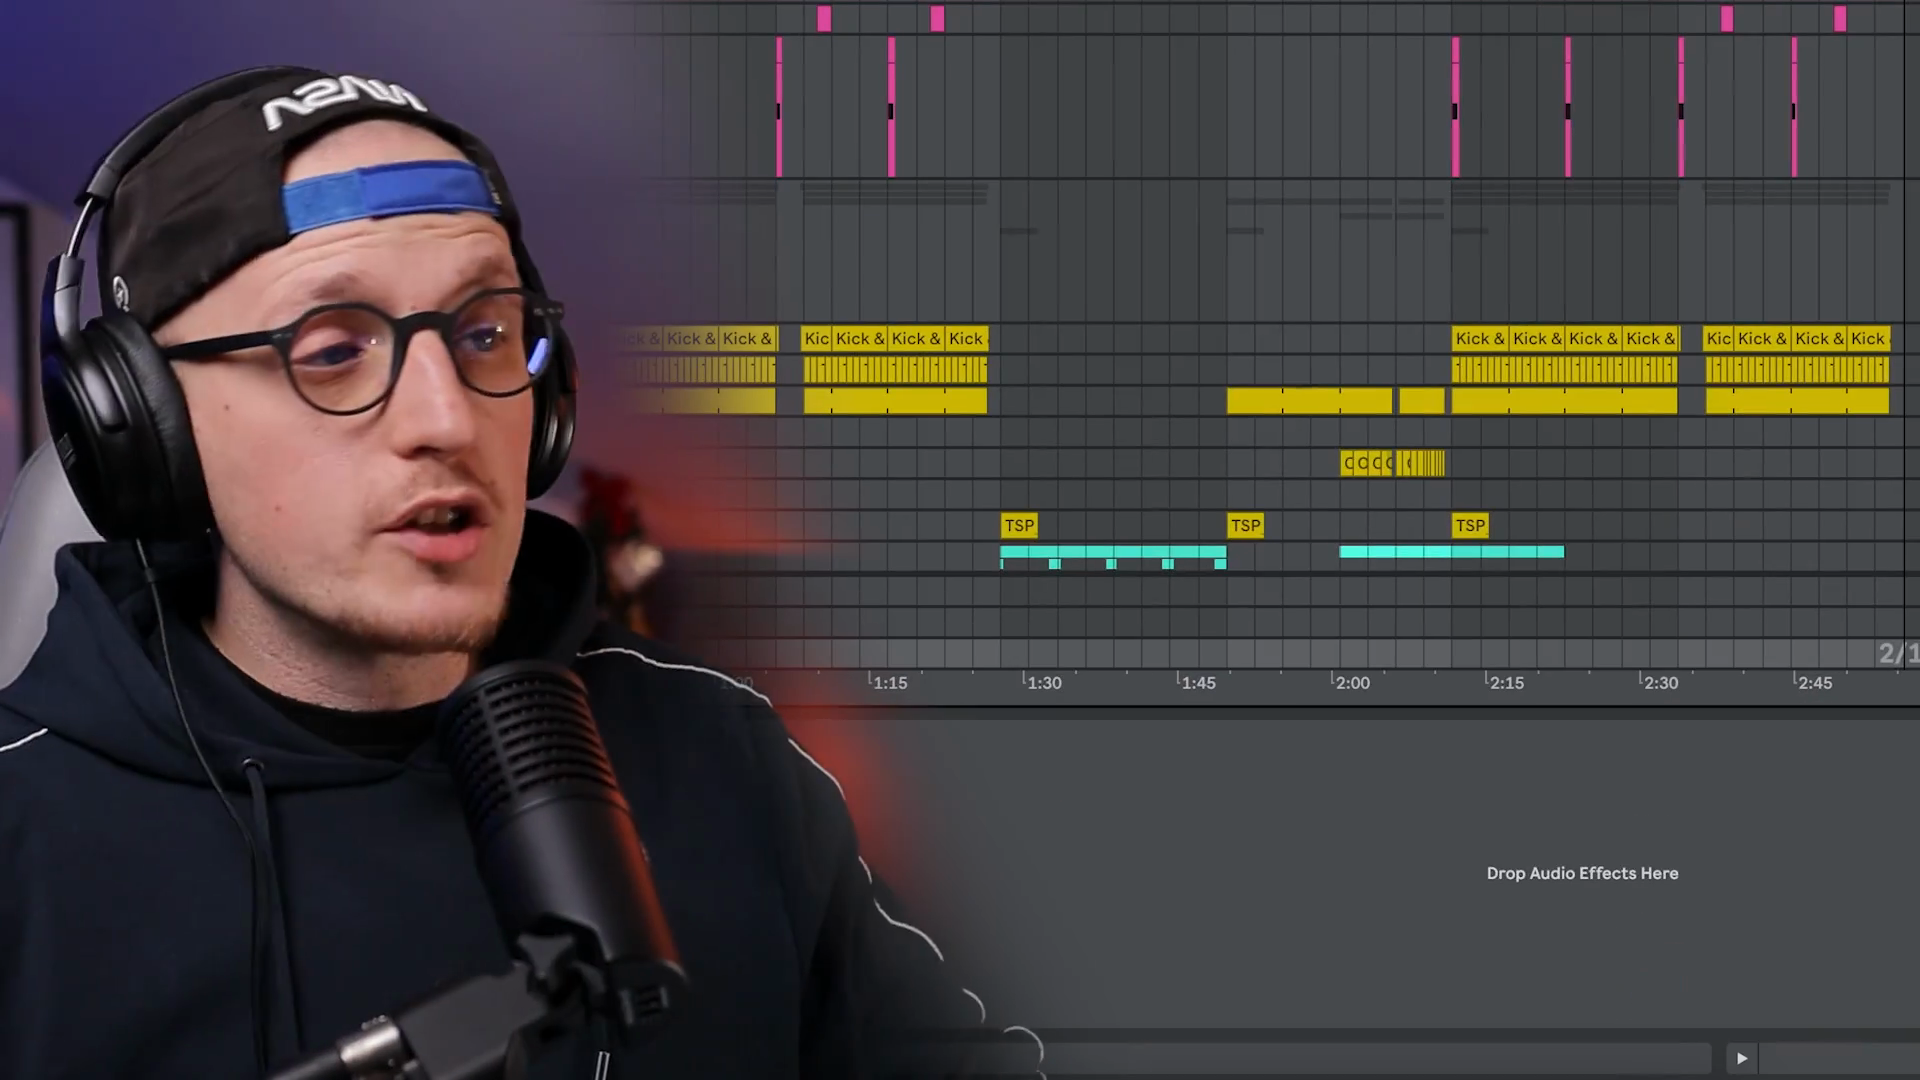
Key idea:Use the-6 dBmetering ranges on Ableton's mixer as a visual guide for setting proper levels for different instrument types.Process / settings:- Find the loudest part of your song (usually the drop)
- Solo the loudest sound (usually kick drum)
- Set kick to peak at
-6 dB - Use the visual ranges (
-6,-12,-18,-24) as brackets for other elements - This approach leaves healthy headroom (around
-3 dB) on master after mixing in all elements
Result:Proper gain staging that prevents clipping and provides headroom for mastering chain processing.Notes:The-6 dBstarting point prevents reaching0 dBtoo early when adding other elements. Ableton's meter ranges (-6,-12,-18) guide you on how to mix by providing visual reference points.
01:12 → 02:27
Mixing Elements
Key idea:Different instrument types sit in specific level ranges relative to the kick for optimal balance.Process / settings:- Snare:
-6to-12 dBrange (should hit nearly as loud as kick) - Bass:
-6to-12 dBrange (bass with more harmonics and mid-range should be even lower due to perceived loudness and Fletcher-Munson curve) - Lead synths:
-12to-18 dBrange - Percs:
-12to-18 dBrange or quieter - Rides/cymbals:
-18to-24 dBrange - Secondary leads:
-12to-18 dBrange (adjust to taste to avoid ear-piercing frequencies)
- Snare:
Result:Balanced mix with proper hierarchy where kick and snare are prominent, bass sits properly, and other elements support without overwhelming.Notes:These are guidelines, not magic numbers - still use your ears, creative decisions, and your own vibe. The ranges keep you in correct brackets while allowing creative flexibility.
02:27 → 04:57

Template Setup
Key idea:Create a default Ableton template with pre-set utility gain adjustments to speed up future sessions.Process / settings:- Pick a mix made with this method that sounds good
- Write down the dB amounts you turned down for main elements (kick, bass, main lead, chords, etc.)
- Open new Ableton Live set
- Create default tracks for kick, bass, chords, etc.
- Add Utility tool to each track and set the gain knob to those values
- Save as your default template
Result:Every new session starts with proper gain staging already in place, especially useful when working in the same genre with the same drum sets and 808s.Notes:This method creates a pattern that speeds up workflow once you establish what works for your style and sound palette.
04:57 → 05:34
Sound Selection
Key idea:Proper leveling gets you close to a finished mix, but sound selection is ultimately more important than mixing or leveling.Process / settings:Choose sounds and layers that already work well together tonally and frequency-wise, reducing the need for extensive EQ, compression, and saturation.Result:With good sound selection, leveling alone can get you very close to a complete mix with just a couple of tweaks.Notes:Learning proper sound selection is way harder than leveling or even mixing, but it's the most important skill. If sounds are randomly chosen, it takes an eternity to properly EQ, compress, and saturate them to work together.
05:34